Learn how to edit videos like a pro with this OpenShot tutorial. Free and easy video editing for Windows, Mac & Linux! 🚀🎥
1. Introduction to OpenShot 🎥
OpenShot is a freely available open-source video editing software for Windows, Mac, and even Linux. Its powerful editing functions and the absence of a watermark make it an attractive option for beginner and professional editors alike.
2. Reasons For Choosing OpenShot 💡
🟡 Lifetime Access at No Cost
🟡 No Branding or Watermarks Available
🟡 Available Across Windows, Mac, and Linux Computers
🟡 User-Friendly and Simplistic Layout
🟡 Up to 4K & HD Quality Exports Available
🟡 Sophisticated Editing Tools (Effects, Transitions, Green Screen)
3. Required System Resources 🖥️
- Windows: Windows 7, 8, 10, 11 (64-bit)
- Mac: macOS 10.15+
- Linux: Ubuntu 18.04+
- RAM: 4 GB (8 GB recommended for ease of use while editing)
- Storage: Free space > 2 GB
- Graphics: Integrated or dedicated GPU (optional)
4. Steps to Download & Install OpenShot Software 🔽
- Visit OpenShot.org
- Press the Download button
- Choose the Operating System (Windows, Mac, Linux)
- Download and install like any other software
- Launch OpenShot—it should be ready to edit after installation! 🚀
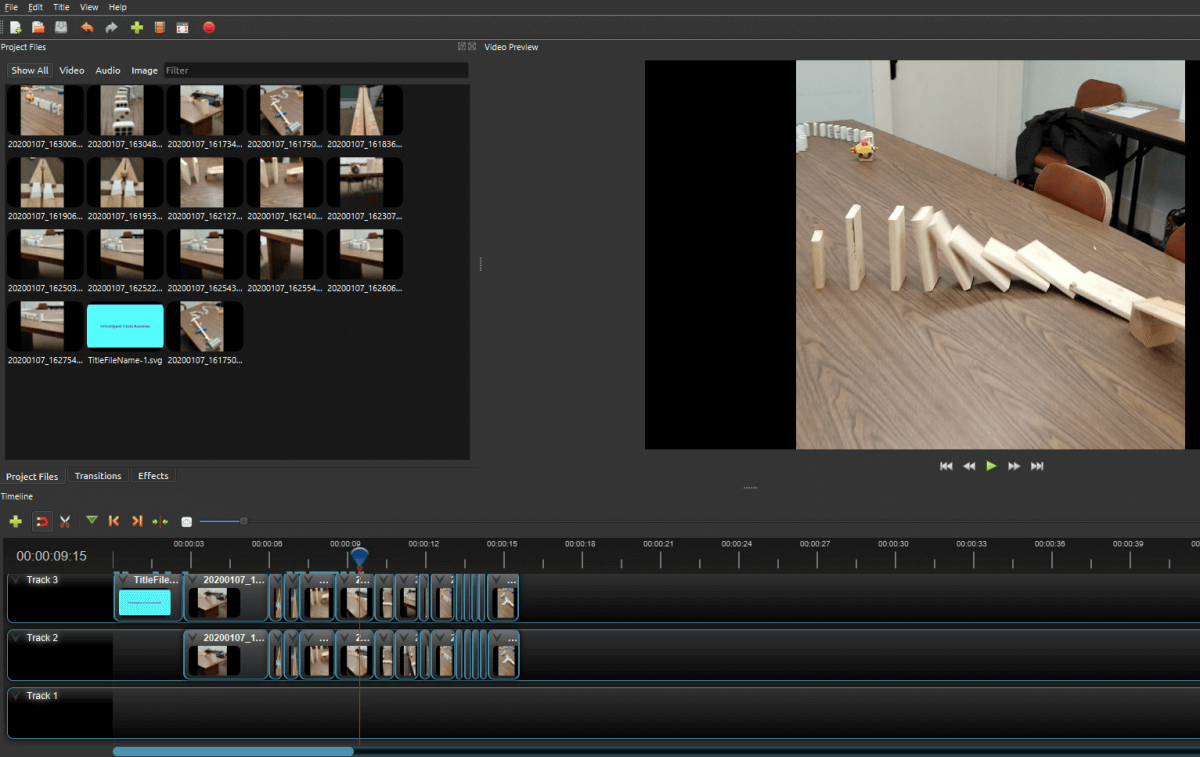
5. OpenShot Interface Overview 🖱️
The user interface is divided into:
- Project Open Files: Stores imported media like videos, images, and audio
- Preview Window: Displays video edits in real-time
- Timeline: Arranges and edits clips
- Effects & Transitions: Filters and animations
- Toolbars: Quick access to cutting, trimming, exporting, etc.
6. Importing Media Files 📂
To edit files, you have to import the media files first:
- Go to OpenShot and click on Import File (or drag and drop files).
- Choose any of the following – videos, images, or audio.
- Your uploaded files will show up in the Project Files tab.
7. Editing Basics: Trimming & Cutting ✂️
🎬 Join Clip Video: Reduce video duration by pulling the edges of the clip.
🎬 Cut Clip Video: Use the Razor Tool to split clips.
🎬 Remove Clip: Right-click > Remove Clip.
Pro Tip: If you want to undo an action, hit Ctrl + Z.
📚 Unlock Unlimited Learning with Kuku Courses! 🚀
💡 All-in-One Membership for Exclusive Courses!
✅ Access 100+ Expert-Led Courses on AI, Marketing, Business & More! ✅ Lifetime & Yearly Plans Available – Learn at Your Own Pace! ✅ No Extra Costs – One Membership, Unlimited Knowledge!
🔗 Learn More & Get Started →8. Working with Audio 🎵
🎵 Adding Background Music:
- Import the music file you want to use.
- Drag the music file to a lower track under the video.
- Adjust the music file length to match the video.
🎵 Adjusting Volume:
- Right-click the audio track > Volume > Increase or Decrease.
🎵 Muting or Removing Audio:
- Right-click on the clip > Separate Audio > Remove Audio.
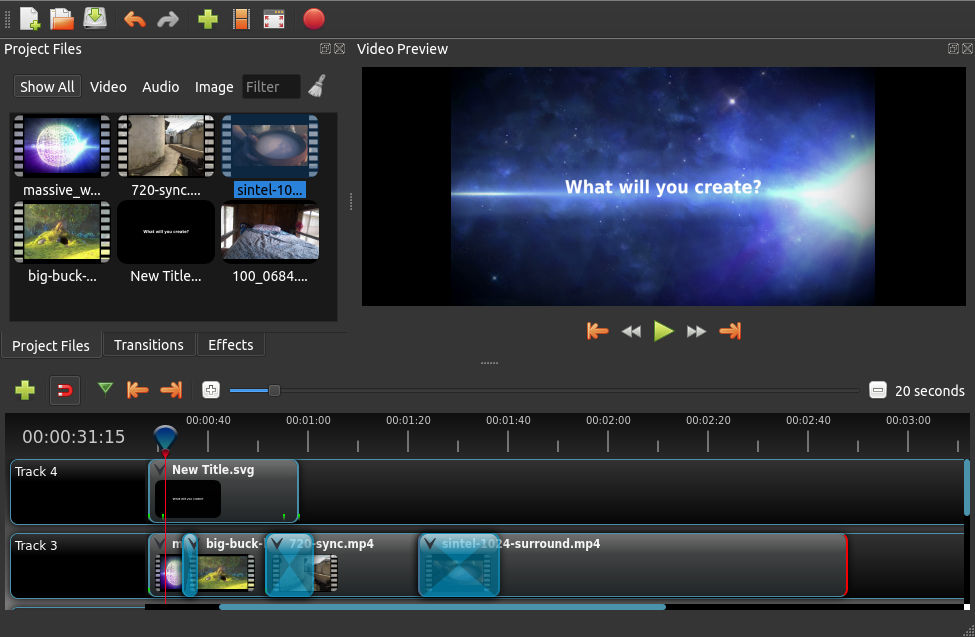
9. Adding Transitions & Effects 🔄
🎭 Adding Transitions:
- Overlap two clips on the timeline to create a transition.
- Open the Transitions tab.
- Choose a transition (fade, slide) to place between the clips.
🎨 Applying Video Effects:
- Go to the Effects tab.
- Drag an effect (blur, brightness) onto your clip.
- Modify the effect in the Properties Panel.
10. Using Green Screen (Chroma Key) 💚
- Import a green screen video.
- Position the green screen video above your main video.
- Navigate to Effects > Drag Chroma Key onto the green screen video.
- In Properties, choose the green color to be removed.
- Modify the threshold to create a clean effect.
11. Adding Text Titles & Watermark 🔠
📌 Adding Titles:
- Click Title > Add New Title.
- Pick a style and type your text.
- Modify font, size, color. openshot tutorial
- Adjust the title’s position by dragging it into your timeline.
📌 Adding a Logo or Watermark:
- Import your logo (PNG recommended).
- Position it above the main video.
- Use Properties to position and resize it.
12. Creating Cinematic Effects 🎞️
🎥 Adding Cinematic Bars:
- Navigate to Effects > Drag Bars onto your clip.
- Use Properties to adjust the top & bottom size.
🎥 Color Grading:
- Adjust saturation using the saturation effect.
13. Exporting Your Video 📤
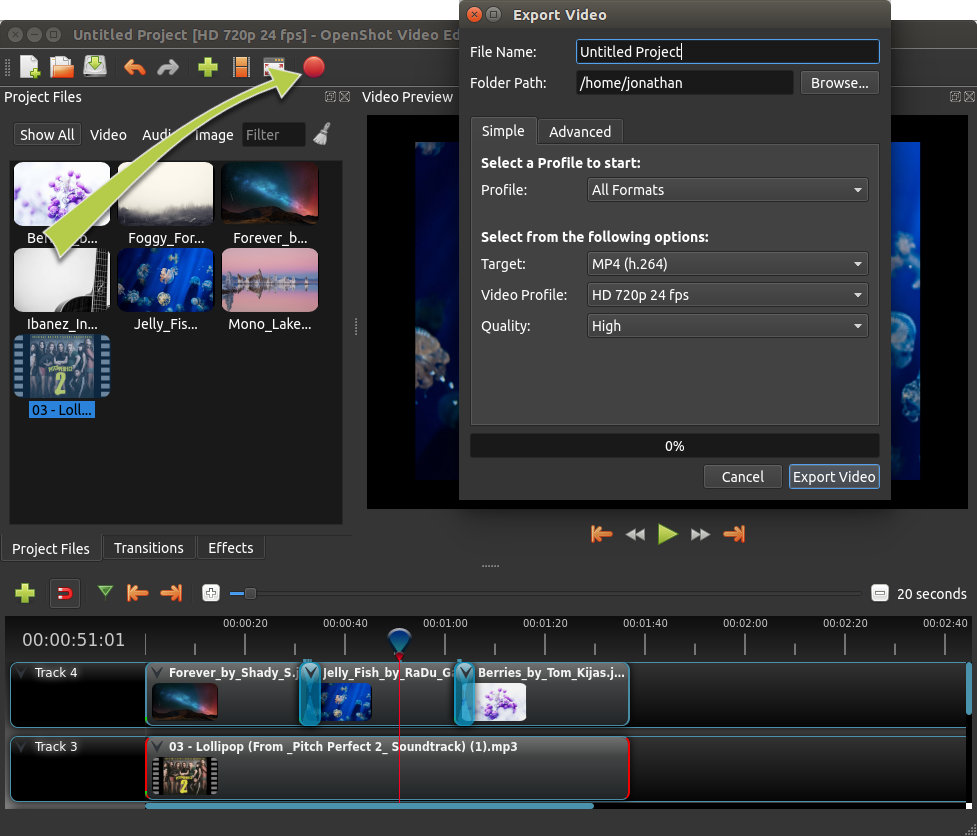
- Click Export Video.
- Choose a format (MP4 recommended).
- Select 1080p or 4K resolution.
- Click Export and wait for the video to render.
14. Editing YouTube Shorts & Instagram Reels 📱
📌 Change Aspect Ratio to Vertical (9:16)
- Click Choose Profile > HD Vertical (1080×1920).
📌 Resize & Adjust Clips
- Use the Transform Tool to fit your video.
📌 Export in High Quality
- Use MP4 and 30/60 FPS settings.
15. Free Resources for OpenShot 📦
🎵 Free Music & Sound Effects
🎥 Free Stock Videos
🎨 Free Images & Icons
16. AI Tools for Image and Video Editing 🤖
🖼️ AI Image Generators
- Leonardo
- DALL·E (via ChatGPT)
🎬 AI Video Editing Tools
- Runway ML
- Canva AI Video Editor
17. FAQs ❓
❓ Is OpenShot free to use?
Yes! OpenShot is 100% free and open-source with no watermarks.
❓ Can OpenShot be installed on Mac?
Yes, OpenShot works on Mac, Windows, and Linux.
❓ Does OpenShot support 4K video editing?
Yes! You can edit and export HD, 4K, and even 8K videos.
❓ How do I fix OpenShot crashing issues?
Try updating OpenShot or reducing the video resolution and effects.
❓ Is OpenShot good for professional video editing?
Yes! OpenShot has powerful features for both beginners and professionals.
Final Thoughts 🚀
OpenShot is an amazing free video editor that allows anyone to create high-quality videos. Whether you’re making YouTube videos, social media content, or professional projects, OpenShot has everything you need. Hope you like openshot tutorial.
🔹 Download OpenShot today and start editing! 🎬💻
🔥 Any suggestions? Leave a comment below! ⬇️
If there is any issue with the openshot tutorial contact us.


